|
|
VMS Online Portal
In addition to the Visitor module in IXM WEB, Invixium offers a standalone VMS Online Portal ( to be purchased separately) that allows visitors to book their own visits. It consists of the following steps:
-
Installation and Configuration of VMS Online Portal
-
Self registration by the visitor
-
Visit Request by the visitor
Follow the steps below to install and configure VMS Online Portal:
STEP 1:
Extract the "VMS_Online_Portal_3_0_19_0.zip" file received from Invixium in C drive.
STEP 2:
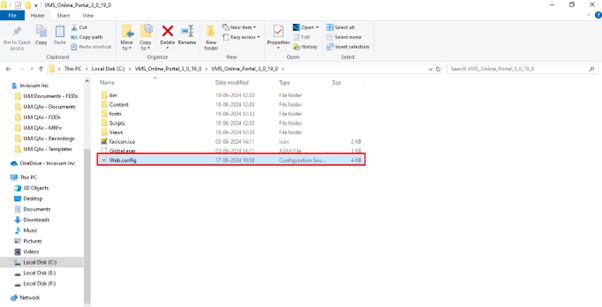
In the "VMS_Online_Portal_3_0_19_0" folder, click on the Web.config file to open it.
STEP 3:
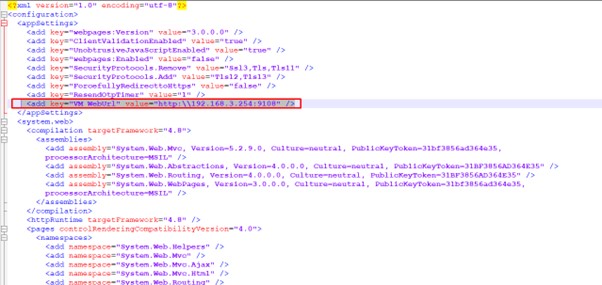
To integrate VMS Online Portal with IXM WEB, locate the line highlighted in the below image. Then, enter the URL of your IXM WEB in the "value" property.
STEP 4:
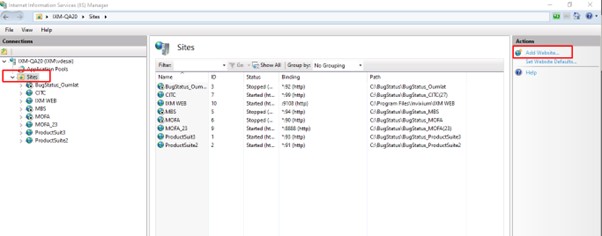
Open IIS and click on the Add Website link to add a new Website.
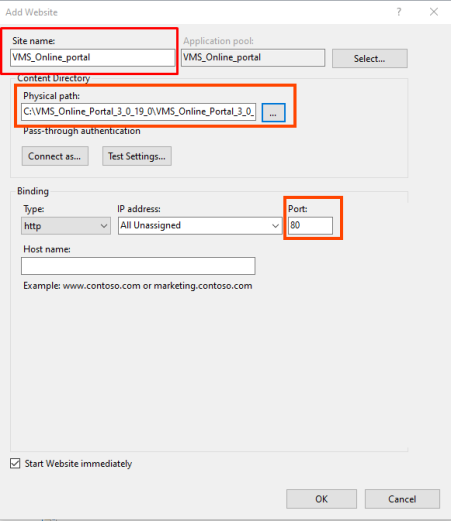
Enter the following details for the Website:
Site name:
Enter the site name for the VMS Online Portal.
Physical path:
Select the physical path of the "VMS_Online_Portal_3_0_19_0" folder on C drive.
Port:
Enter the port number for the portal.
Click on the OK button to save the settings. Upon saving, you will see the entered Site name under the "Sites" folder in the left side of the screen. Click on the Cancel button to discard the action.
STEP 5:
Click on the Site name. Click on the Restart link in the right side of the screen. Then, click on the Browse link as shown below:
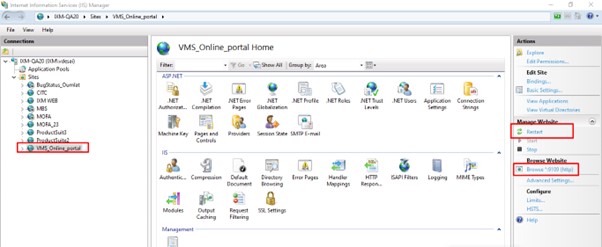
STEP 6:
Upon successful setup, the VMS Online Portal will open and be displayed as follows:
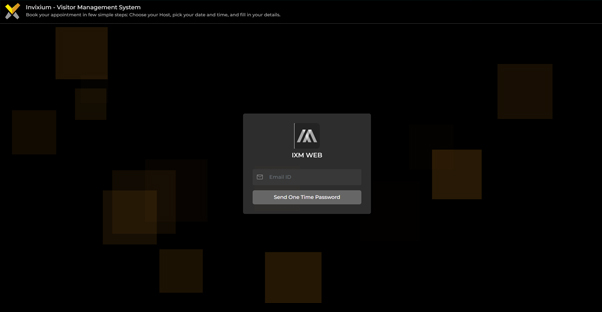
The visitor will receive an email invitation with the URL of the VMS Online Portal.
Upon opening the site, the visitor must register themselves by entering their email address as shown below:

The visitor enters their email address in the box provided. Upon clicking on the Send One Time Password button, the visitor will receive a 4 digit password that they have to enter for verification.
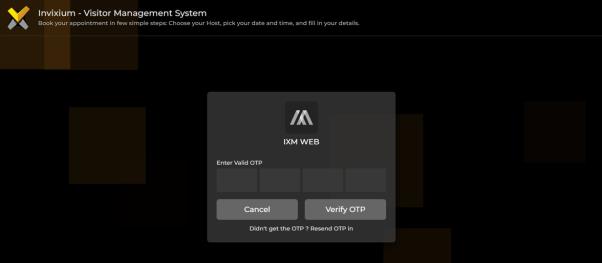
Once entered, click on the Verify OTP button to continue with verification or Cancel button to discard the action.
Upon successful verification, the following screen will be displayed for the visitor to enter their details:
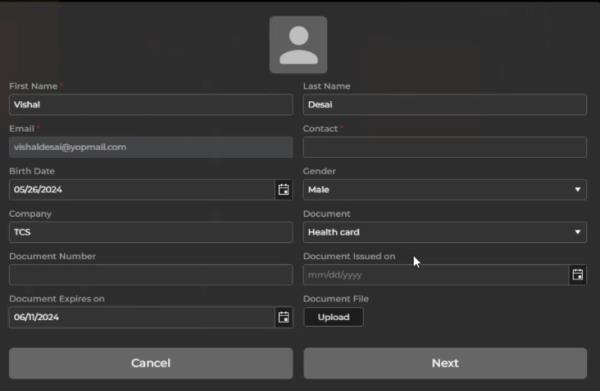
The visitor's profile picture will be displayed at the top of the screen. It can be changed by clicking on the ![]() icon when the mouse is hovered over the image.
icon when the mouse is hovered over the image.
First Name:
The visitor will enter their first name.
Last Name:
The visitor will enter their last name.
Email:
The registered Email address of the visitor will be displayed. It can not be changed.
Contact:
The visitor will enter their contact number.
Birth Date:
The visitor will enter or select their date of birth.
Gender:
The visitor will select their gender from the dropdown list.
Company:
The visitor will enter their company's name.
Document:
The visitor will select their document type from the dropdown list.
Document Number:

This option will be displayed if a Document type is selected.
The visitor will enter their Document Number.
Document Issued On:

This option will be displayed if a Document type is selected.
The visitor will enter the date on which the Document was issued.
Document Expires On:

This option will be displayed if a Document type is selected.
The visitor will enter the date on which the Document will expire.
Document File:

This option will be displayed if a Document type is selected.
The visitor can upload the Document file manually from its location by clicking on the Upload button.
Only JPG, JPEG, and PDF files can be uploaded.
Upon successful upload, the file name will be displayed. T the attached file can be removed by clicking on the x icon.
Once entered, the visitor can click on the Next button to request a visit or Cancel button to discard the action.
After saving details, the visitor can request for a visit as follows:
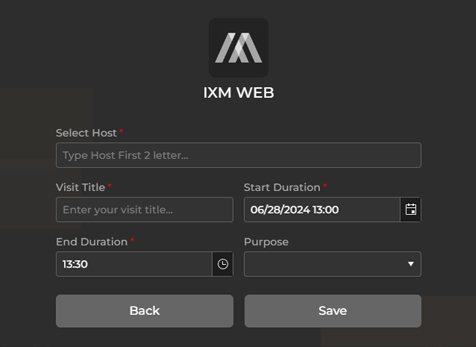
Select Host:
The visitor can select the host of the visit from the dropdown list.
Visit Title:
The visitor can enter the title for the visit.
Start Duration:
The visitor can enter or select the starting date and time for the visit.
End Duration:
The visitor can enter or select the ending date and time for the visit. By default, the visit duration is set for half an hour.
Purpose:
The visitor can select the purpose of the Visit from the dropdown list.
Once done, the visitor can click on the Save button to request the visit or Back button to go back to the previous screen.
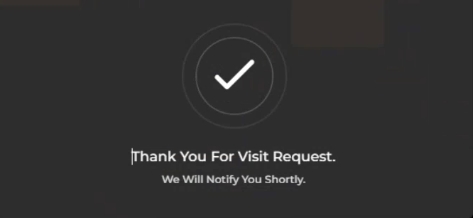
Once the visit request is raised, it will be available in the Visitor module of IXM WEB. The host of the visit will need to approve it before proceeding further.
